How To: 4 Axis Slope Aerobatics
4 axis dynamic camber in action
The author employing 4 axis dynamic camber controlled via a spring-centered flap stick on his Spektrum DX6e.
What is “4 axis” flying?
4 axis flying is another French contribution to the radio controlled soaring world. Most pilots are familiar with the more common 2 and 3 axis concepts, in which the elevator, ailerons and rudder (for 3 axis planes) provide pitch, roll and yaw control of the aircraft. In 4 axis flying, the additional axis of control comes from the use of dynamically controlled flaps and/or flaperons that allow the pilot to instantly deploy a variable degree of camber or reflex along the wing’s trailing edge.
4 axis control is effected via the use of a return spring on the throttle or flap stick. From the spring-centered position, pushing forward on the flap stick raises the trailing edge, reflexing the airfoil proportional to stick deflection. Pulling downwards on the stick lowers the trailing edge, cambering the airfoil proportional to stick deflection. Releasing the stick returns the trailing edge to neutral position.
Combined with a suitable airfoil and large control surfaces with plenty of movement, 4 axis flying allows a degree of control quite different from the more traditional arrangements for camber and reflex manipulation. Because you can instantly switch back and forth from camber to reflex and/or neutral (and vice versa) you can give the plane exactly what it needs, when it needs it. You also have extremely precise and dynamic control over exactly how much trailing edge deflection is deployed.
Note: the following images present a Mode II setup – Flaps & rudder on left stick, aileron & elevator on right stick
 |
||
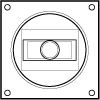 |
 |
Flap stick centered, trailing edge is at its neutral position. |
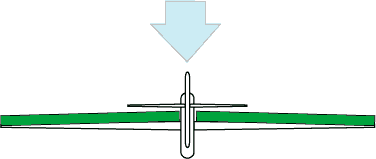 |
||
 |
 |
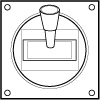
Flap stick up, trailing edge reflexed. The wing produces less lift. |
 |
||
 |
 |
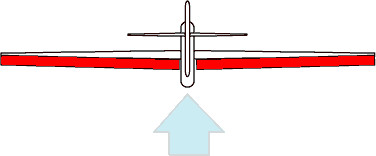
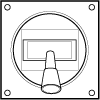
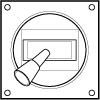
Flap stick down, trailing edge cambered. The wing produces more lift. |
Most of the time, in addition to modifying how much lift the wing generates, deploying flaperons will also cause a pitch reaction. Typically, deploying camber (i.e. dropping the trailing edge via down flap stick) will cause the plane to pitch up, and deploying reflex will cause it to pitch down. However – each design is unique, and some will respond differently when reflex and camber are applied than others. As needed and/or desired, elevator compensation can be mixed in so that the plane will have no pitch response when the trailing edge is manipulated.
In any event, regardless of pitch response caused by deploying reflex or camber, at the most simplified level, the function of these flap deployments upon the airfoil remain consistent:
- Camber causes the wing to generate more lift when the plane is upright, but less lift when it is inverted.
- Reflex causes the wing to generate less lift when the plane is upright, but more lift when it is inverted.
Depending upon the airfoil and how much camber or reflex are deployed, the amount of drag the wing generates can be significantly increased as well.
At large deflections (say 30° or more), the use of reflex and/or camber can serve as a landing aid.
Snapflaps
Aerobatic gliders are often setup using snapflap mixing (trailing edge is slightly cambered when up elevator applied, and slightly reflexed when down elevator applied). Based on the description above of how flaps influence the wing’s ability to generate lift, it should be immediately obvious the benefit that snapflaps can bring to any glider. They increase the wing’s ability to generate lift in desired direction (i.e. camber is deployed for nose up pitch, and reflex for nose down pitch), which – when setup correctly – allows the wing to the generate greater lift at a lower angle of attack, and with less elevator deflection, than it would otherwise be able to. This translates into less drag and, ultimately, more speed and energy being retained. For gliders, those are good things!
In fact, snapflaps are especially helpful – in truth, essential – for extending the performance of a modern symmetrical aerobatics airfoil as used on high performance aerobatics gliders. Beyond that, most modern aerobatics airfoils will also benefit from the use of snapflaps. Many airfoils are in fact designed with snapflap deflection in mind; the popular MG-05 (Aeromod Voltij) and TP-42 (FlyBiWo Wasabi and others) are perhaps two of the best-known examples.
It’s outside the scope of this article to go into great detail about the benefits of snapflap mixing, but the subject has been treated extensively in a great series of articles by Thierry Platon (creator of the TP series of airfoils) on Pierre Rondel’s fantastic Planet-Soaring.com. I suggest you go read those, then come back here to understand how 4 axis dynamic flaps are used to both expand and work around some of the challenges that snapflaps introduce for aerobatic flying.
Du bon usage des volets et autres snapflaps (Source: Planet-Soaring.com)
- 1ère partie : volets et performances
- 2ième Episode : volets, équilibre et stabilité
- 3ième et dernier épisode : Les secrets du snapflap
(Don’t be afraid of the French; Google Translate is your friend!)
Aerobatics Gliders, Snapflaps, and why having 4 Axis Dynamic Flaps is awesome
The downside of snapflap mixing for aerobatics gliders is that the same reflex and camber applied by the mix will tend to make it harder to perform aerobatics figures that depend on stalling the wing – i.e. snap rolls and spins. Why is this?
Snaps and spins are both types of autorotation. An autorotation occurs when one wing exceeds its critical angle of attack and stalls while the other wing is still generating lift. The mismatch in forces causes the aircraft to roll violently in the direction of the stalled wing.
Snaps and spins are induced by a combination of control inputs designed to cause the aircraft to enter this asymmetric stall condition. Typically, they are initiated by a sharp, simultaneous maximum deflection of both elevator and rudder (many lightweight RC aircraft benefit from the application of pro-spin aileron, as well). The elevator induces a pitching force that causes the wing to exceed its critical angle of attack. The rudder induces a yaw rotation that, when combined with the elevator input, causes the forward-moving wing to remain flying while the rearward-moving wing is stalled. This asymmetrical stall causes the autorotation to initiate, and a snap or spin results.
Although snapflaps do not typically change the wing’s critical angle of attack – i.e. the point at which it will stall – experience shows they can make it harder for the glider to enter or remain in the stalled condition. This is especially the case with lightweight aerobatic slope gliders, some of which can be very difficult to stall at all. Furthermore, once a snap or spin is initiated, the autorotation induced is neither as tight nor as axial as if snapflaps were not in use. So, although snapflaps are absolutely incredible performance enhancers for most aerobatic glider flight, they are big negatives when it comes to performing snapping and spinning figures.
What to do? There are a few ways to work around this. The first and most obvious is to control your snapflap mixing via a switch, allowing you to turn it off when you want to perform snap or spin figures, then turn it back on when the figure is complete. While this solves the problem that snapflaps introduce, it increases the pilot workload quite a bit, and leaves you having to choose between having your glider performing at optimum (i.e. when snapflaps are enabled) and being able to perform clean snap and spin figures (i.e. when snapflaps are disabled).
However, there is a better way to solve this problem: yes, you guessed it, a 4 axis setup can completely alleviate the undesirable downsides that snapflaps bring to snaps and spins, and in fact, can allow you to make snaps and spins that are even tighter, faster and harder than an unmodified neutral wing. Plus, the dynamic flaps afforded by a 4 axis setup require no switch flipping to take advantage of; they can be used as much or as little desired to both cancel out as well as augment, when appropriate, the snapflap mix.
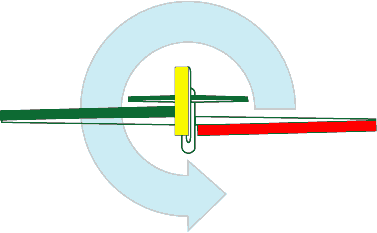
See the diagrams below for further explanation.
 |
||
 |
 |
Snap roll control inputs & surface movements with no mixing enabled. Note that both the stalling wing (left) and the unstalled wing (right) have equivalent amounts of control surface deflection. |
 |
||
 |
 |
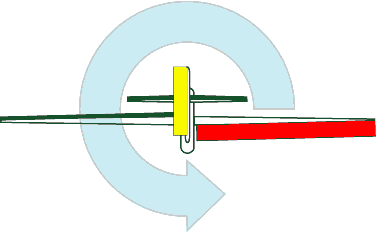
Snap roll control inputs & surface movements with Snapflap mixing enabled but no 4 axis reflex compensation. Note that the stalling wing (left) has very little reflex and the unstalled wing (right) has so much deflection that it is probably generating more drag than lift. Together, these will make the snap roll slower and more difficult to initiate. |
 |
||
 |
 |
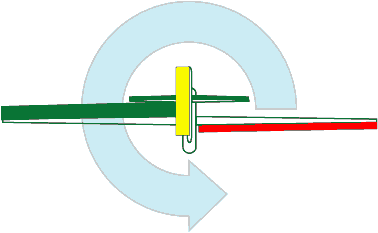
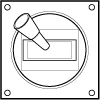
Snap roll control inputs & surface movements with both Snapflap and 4 axis mixing enabled. Note that thanks to the 4 axis reflex compensation input at the flap stick, the stalling wing (left) has much more surface deflection than the unstalled wing (right). This will make the snap easier to initiate as well as more rapid and violent. With less 4 axis compensation applied, the pilot could also have replicated the surface deflections of the standard non-mixed setup. |
Of course, snap rolls and spins are not the only aerobatic figures which can benefit from 4 axis mixing. The possibilities are limited only by a pilot’s talent and imagination. Some other examples include the following:
- Hammerheads: Just prior to initiating the rudder kick at the top of the figure, apply full 4 axis reflex. This will immediately cause the wing to stop flying and enhance the effectiveness of the yaw input.
- Loops: Deploy additional camber (beyond whatever you get from your snapflap mixing) to make a loop extra tight. Conversely, apply full camber (or reflex if inverted) and make an extremely slow loop with no fear of stalling.
- Fly backwards: In sufficiently strong lift conditions, you can deploy enough camber to make the plane fly backwards in a controlled hover. If you start to climb too much, deploy reflex and descend. You can almost bounce the plane up and down like a basketball!
Setup tips for 4 axis flying
- You’ll generally want to get as much travel as you can on your flaperons so that you have the widest range of possibilities for your 4 axis setup.
- Plan on running at least 30-50% negative exponential to soften up the center feel on your surfaces so that the plane remains responsive but is not difficult to fly.
- You may or may not want to include deadband on the flap stick, but it is not a bad idea.
- Definitely setup your flap stick with some kind of return spring system – trying to manually center the stick without a return spring will get very old, very fast. In a pinch, try wrapping a rubberband around the transmitter case, looped around the flap stick at either end.
It’s easy to slowly work into flying 4 axis style. With time and practice, manipulating the flap stick will become as automatic as the other controls, and you may find (like this author) that you really don’t enjoy flying unless you’ve got full “4 axis” control!
Have fun and best of luck!
References:
- Pilotage 4 axes : Passez au volets dynamiques (French). By Marcel Guwang. One of the original articles about 4 axis flying, available via Pierre Rondel’s superb Planet-Soaring.com website.
- Le pilotage 4 AXES (English). By Alexis Maréchal of Aeromod, maker of the Voltij. A brief but also very good discussion of 4 axis flying.
